The Ultimate Terraform Workflow - Setup Terraform (And Remote State) With Github Actions
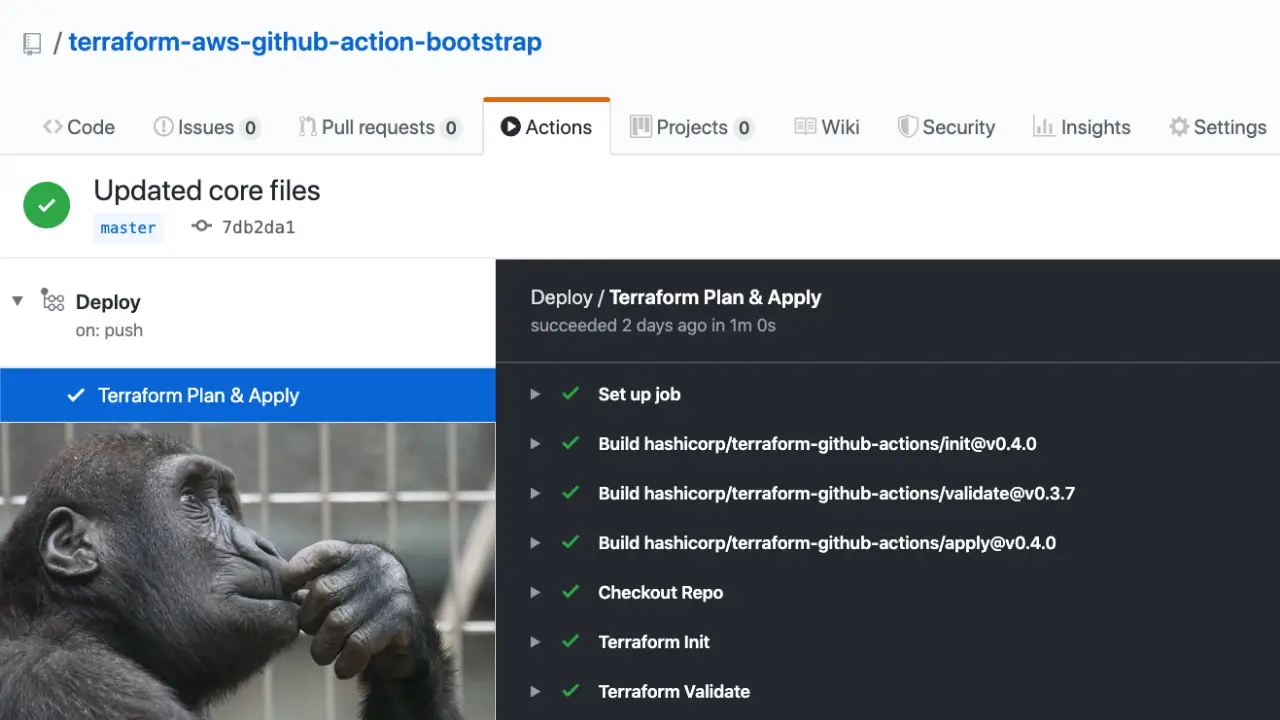
Running Terraform in a CI Server can be incredibly useful when you’re trying to automate or experiment with cloud resources. One of the easiest, cheapest and most accessible setups I’ve found is using Github Actions and S3 for state.
But learning a new technology can be frustrating especially when the anxiety of: “Am I doing this right?” strikes. In this article I’ll walk you through how to get a Terraform project running in Github Actions from start to finish — with all the details you need to understand what’s happening and why. **By the end of this article you will have a running Terraform project on Github Actions using remote state. **
What We’re Building Today
After writing quite a lot about Terraform I’ve had repeated requests to have a simple Terraform workflow. So today I’m sharing how to simply setup a workflow using Terraform and Github Actions that I have used personally not just for general experimentation but also learning and real applications. ** Note:**All the code for today’s article is within the following Github repo so be sure to open it up for reference!
https://github.com/loujaybee/terraform-aws-github-action-bootstrap
Terraform is a great way to learn Cloud, check out this article to understand why: 5 Important Reasons To Learn Terraform Before Cloud Computing.
Terraform, AWS & Github Actions — Why?
But, before we get into the setup, let’s quickly recap on what each of these technologies does and why you’d want to use them.
Why Terraform?

Terraform logo
Terraform is a CLI tool that allows you to create infrastructure declaratively as code. When your infrastructure is written as code you can apply the same quality assurance processes like code review, and build pipelines.
One of the main reasons I really like Terraform is that it’s cloud platform agnostic, you can use it with AWS, GCP, etc. That means once you understand Terraform you don’t need to re-learn your infrastructure as code tooling if you want to use another cloud service.
Need a refresher on Infrastructure As Code? Check out: Infrastructure As Code: A Quick And Simple Explanation. Or for detail on declarative infra as code? Check out: Declarative vs. Imperative Infrastructure As Code
Why AWS?

AWS Logo
And then the question is: why AWS? Well there’s two reasons: one is because… it’s AWS (more on this later), and also simply because I needed to integrate with something in order to create the demo!
You can infact re-use today’s CI setup with all other Cloud providers too. We’ll cover how you can do that in detail at the end of the article if you’re interested.
But, the reason I picked AWS is because it’s most likely the cloud provider that you want to learn, or already use. Not only that, but AWS is the market leader and has the most mature Terraform community.
New to AWS? Check out: Where (And How) to Start Learning AWS as a Beginner
Why Github Actions?
GithubActionsBeta
Lastly, the question is why Github Actions? Firstly it’s because Github Actions integrates with Github without needing to setup any other accounts, that’s less work for you and makes the setup quicker.
Not only is Github Actions quick and easy to setup, but importantly Github Actions is free (for low usage), which means that it’s likely to have the widest accessibility for anyone wanting to setup this workflow.
But aside from those two reasons Github Actions is still a solid CI tool and it has some nice features such as being container based (but that’s a topic for another day!
How The Article Is Structured
Okay that’s enough introduction about what we’re going to do today, let’s actually go ahead and jump into the thick of it. We’ve got a lot to cover, so in order to break everything down we’ll do it in two parts…
In part one we’re going to setup a Terraform back-end with S3. We need our backend in order to run Terraform in CI (don’t worry, we’ll discuss why in just a moment). Then, in part two we’re going to go ahead and put our Terraform pipeline in Github actions and use our previously created remote state.
Before you embark, I must give you a word of warning: setting up Terraform with CI can be quite confusing. There’s no simple way to do it (yet) so we have to do a few (seemingly convoluted) steps to get everything working. But stick with the article to the end as all will be revealed along the way.
The process of setting up Terraform with CI and remote state can be pretty fiddly but I’ll do my best to talk you through what we’re doing and why at each step so you have a good understanding of what’s going. Trust the process!
Sound good? Let’s get to work!
Part 1: Create The Backend
So the first thing we’ll need to do is create our Terraform backend. But before we can do that we need to understand what a backend is, so let me explain…
What is a Terraform Backend?
Terraform works by comparing existing resources in your cloud provider (using the cloud API’s) against a stored state file. The state file is a representation of the resources that you manage with Terraform.
Think of state like an inventory list. When you take something out of your inventory you remove it from your list. And by having a list you can quickly check what’s in your inventory without needing to manually look through it.
The state file file is the inventory. And it’s actually a basic JSON file. Whenever you run Terraform it updates your state file, which is by default stored on the machine running it. But if we want to collaborate with others or use Terraform in a CI tool storing the file locally won’t work.
In that case we’ll need to store the state in a “remote” location, which is where the idea of remote state comes in. And because we’re using AWS, we can use S3 as our remote state location.
So the first thing we’ll need to do in order to get our Terraform setup running in Github Actions CI is to setup our remote state bucket.
Step 1: Clone The Repo
First up you’ll need to clone the repo. The repo contains a minimal Terraform setup and some Github Action workflows that execute a Terraform plan on pull requests to master, and deploy on merge to master.
git clone git@github. com: loujaybee/terraform-aws-github-action-bootstrap. git#
Step 2: Locally Set Your AWS Access Keys
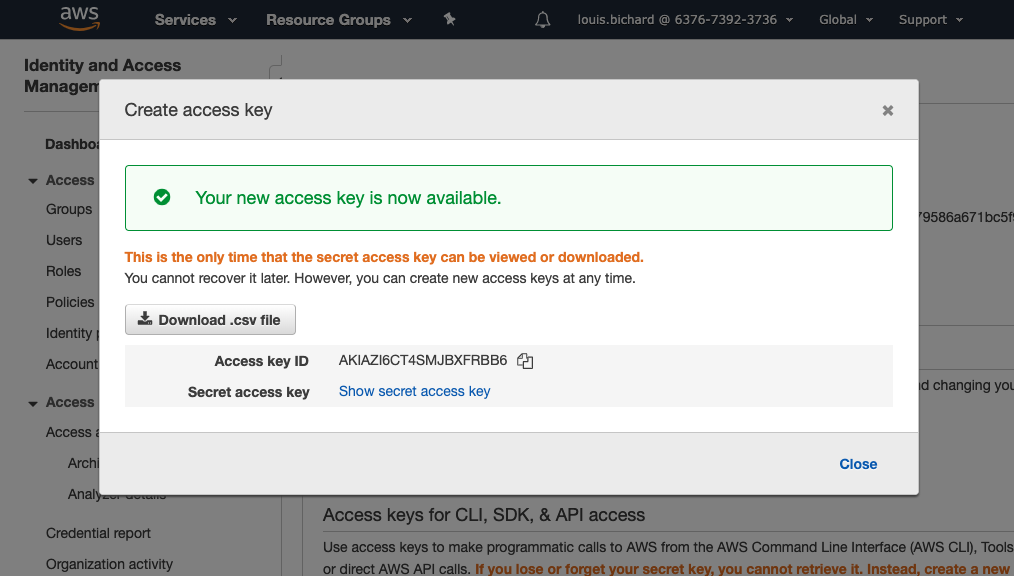
Create AWS Access Key
Now, in order to access AWS we’ll need to get access to our AWS account. The way we’ll do that is via our AWS keys.
You’ll need to download those from your AWS account security credentials page and set them on your local environment.
In bash you can do it like this…
set AWS_ACCESS_KEY_ID=YOUR_ACCESS_KEY
set AWS_SECRET_ACCESS_KEY=YOUR_SECRET_KEY** Important note:**With your access keys an attacker can do anything your user can do with your AWS account. So be as vigilant with them as you would be with the password to your online bank account.
If you’re a little uncertain about what AWS keys are and how they work, be sure to check out this article: AWS access keys — 5 Tips To Safely Use Them.
Step 3: Install Terraform

Terraform Version
Next up in order to run Terraform you’ll need to install Terraform locally. Go ahead and follow the instructions on their website for that. Now when you run…
terraform -v You should see your running Terraform version.
Step 4: Run Terraform Init

Execute Terraform Init
Now with Terraform installed, go into the root of the previously cloned bucket and run…
terraform init Running this command will download any necessary plugins / things Terraform needs to execute, in our case that’s mainly the AWS provider code.
Step 5: Set Your Bucket Name
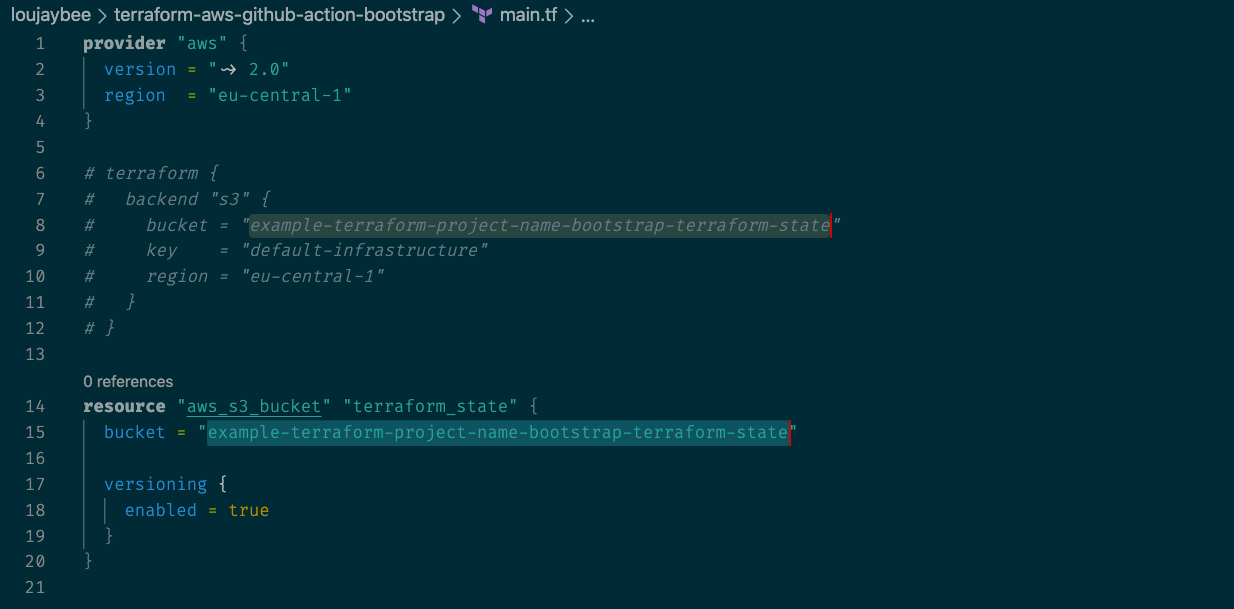
Terraform Backend Bucket Name
Next we’ll need to update the bucket name in the repo. Since bucket names need to globally unique you’ll need to update the bucket name.
So go ahead and open up themain.tf file and update the two bucket values (yes also the one that’s commented out, we’ll need it later) to be a name related to your project.
Something like…
my-demo-terraform-backend ormy-home-automation-terraform-backend#
Step 6: Create Your Bucket
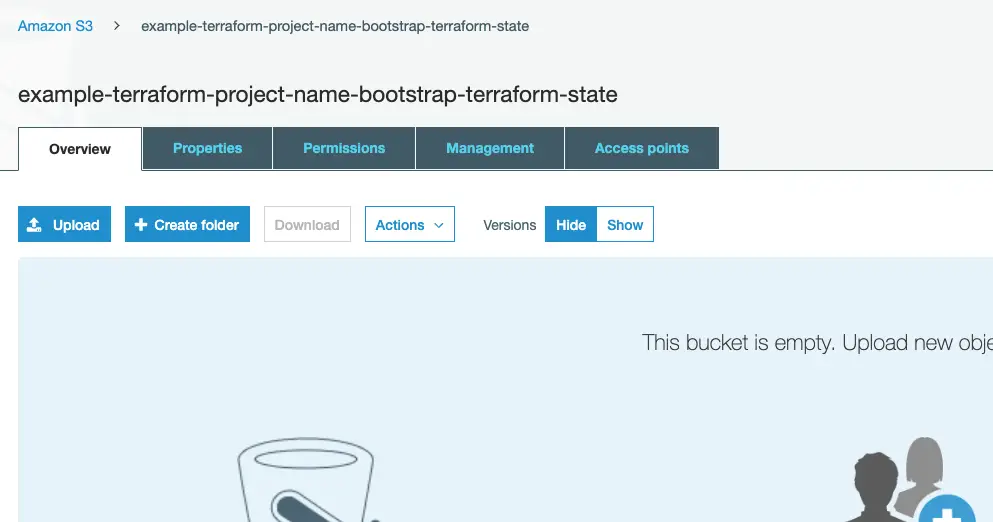
Backend Terraform S3 Bucket
And now with Terraform setup, your bucket name configured and your access to AWS setup you should be able to run your first Terraform code!
Run an apply to create your AWS bucket, like this…
terraform apply And with that we conclude part one. So far you should have a bucket which we’re going to use for our remote state we can now setup our CI pipeline to run terraform remotely rather than on our machine.
But, you’ve got a problem… You’ve just created an AWS resource on your local machine and you haven’t stored the state file anywhere. We don’t want to store the state file in Github as our CI can’t commit to Github — so we need to push that state to our newly created bucket.
Part 2: Setup Terraform on Github Actions
In this part we’ll talk through two main things: moving our previously created local state to our new remote bucket, and then authorising Github Actions to run Terraform.
Step 7: Uncomment the Backend Configuration
As we said before, keeping the state file on the machine that’s running Terraform won’t work for running Terraform in CI.
So to have Terraform working in Github Actions the first thing you’ll want to do is uncomment the backend configuration in themain.tf file. The backend configuration block tells Terraform that we want to use AWS and S3 as our backend remote state storage.
Step 8: Transfer your State to Remote

Copy Local Terraform State To Remote State
Now we want to re-run terraform init.
When we re-initialise terraform it’s going to notice that our current setup (with a backend) is different to our original setup where we were using local state. And since Terraform is smart, it will ask us if we want to transfer our currently created state into our remote bucket.
Now wait… let’s think about what we’re doing for just a moment as this is pretty meta. Essentially we’re going to move the resource information about our backend S3 into our backend S3. That’s pretty weird, why would we want to do that?
Keeping even your backend S3 configuration in your state allows you to ensure that your backend bucket is also managed in Terraform. That’s useful if we want to do things like update our bucket versioning, or configure permissions on our bucket, or implement S3 backups etc.
Now that means our backend S3 is setup and configured. We’re now only missing one thing: Our CI server in Github Actions needs permissions to AWS so that it can execute our Terraform.
Step 9: Setup Your Github Actions Secrets
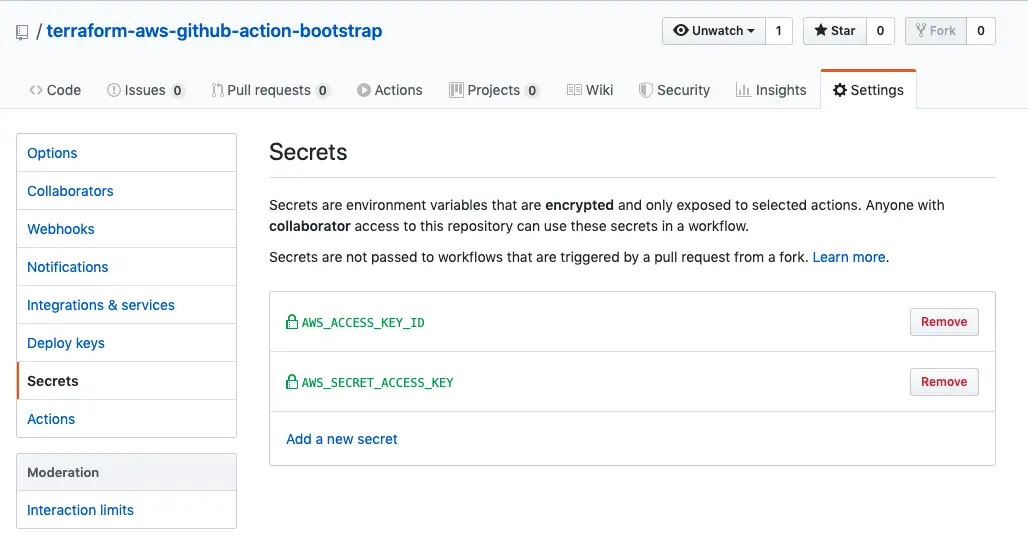
AWS Secrets In Github
The first thing you’ll need to do is ensure that Github Actions has permissions to act upon your AWS account. So go ahead and add your AWS credentials to the secrets settings of your repo (these settings are configured per repo).
Use the exact same key names as you did on your local machine here and set yourAWS_ACCESS_KEY_ID andAWS_SECRET_ACCESS_KEY. That will allow the Terraform AWS plugin to authenticate itself to create your resources.
Step 10: Commit, Push And Run
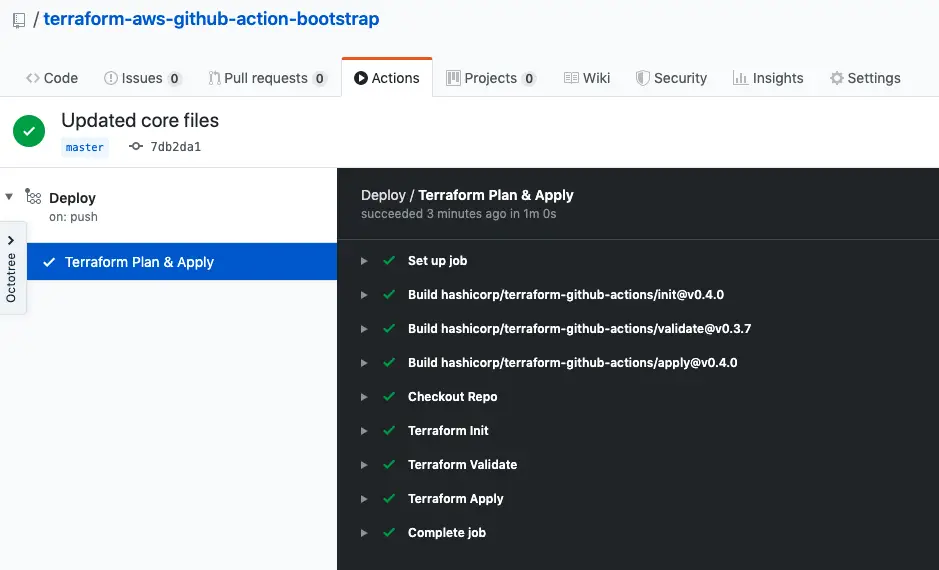
Successful Terraform Apply In Github Actions
And now this last step is an easy one! Commit and push your changes (your bucket name, mainly) to your cloned repo, and watch Github Actions complete!
git add. to add all your local changes.git commit -m "My changes" to commit your changes.git push to send your changes to Github.
Voila! That’s it. Now you have a working Terraform pipeline up and running configured with a Terraform backend.
Advanced Setup (With DynamoDB Locks)
If you want to make your setup more advanced, you can introduce Terraform locks using DynamoDB. Locks simply ensure that your Terraform is not executed by two people at the same time.
But locks are mainly necessary in team environments where running concurrent Terraform apply’s might happen. But I’ll leave that as an exercise for you to figure out from the documentation if you think you need it!
Reusing the Setup For GCP, Azure, etc.

Cloud Vendor Logos
Before I go though, at the start of the article I did promise to mention about how you can re-use the setup for different cloud providers. And it’s pretty simple. All you have to do is add another Terraform configuration into yourmain.tf file (like the AWS one we have) to configure your other accounts.
With a new provider setup all you have to do is add resources from your new provider and Terraform will create them. Terraform doesn’t care that your backend is stored in AWS or S3 nor that you’re running on Github Actions.
More On Terraform
If you’re keen to learn more about Terraform and infrastructure as code I’d highly recommend my free Terraform Kick Start email course. Or alternatively of these articles:
- What Is Terraform Used For? The 3 Main Use Cases.
- How Long Does It Take To Learn Terraform? And How To Speed Up Your Learning.
- Should You Use Typescript To Write Terraform? (The Terraform CDK)
- Terraform: How To Rename (Instead Of Deleting) A Resource
- The Simplest Possible EC2 Web Server Setup Using Terraform (On AWS)
- What is Terraform? A Simple Definition.
- 10 Terraform Best Practices: For Secure & Fast Infrastructure.
- Should You Commit the Terraform. tfstate File to Git?
- The Ultimate Terraform Workflow: Setup Terraform (And Remote State) With Github Actions
- What Is the Best Way to Learn Terraform?
Become A Terraform Guru!
And that is everything we’ll cover today. I really hope that helped you to grasp the different parts you’ll need for setting up Terraform and Github Actions.
I truly believe it’s a great setup and it’s very useful when learning both Terraform and AWS. Now you can create, destroy and update cloud resources simply, quickly and repeatably.
And that’s everything. You should now have a nice setup for running Terraform in Github Actions with repeatability, traceability and better ease of use. Happy experimentation!
Speak soon Cloud Native Friends.

Lou Bichard
Hey I'm Lou! I'm a Cloud Software Engineer. I created Open Up The Cloud to help people grow their careers in cloud. Find me on Twitter or LinkedIn.
See all posts →Latest posts by Lou Bichard (see all)
- 2024 Summary - A year of trips and professional work - January 9, 2025
- 2023 Summary - Data Driven Stories About The Cloud - December 31, 2023
- 2022 Summary - The Open Up The Cloud System - January 1, 2023